Cider Brewing Cheatsheet

The Standard Cider-Making Procedure
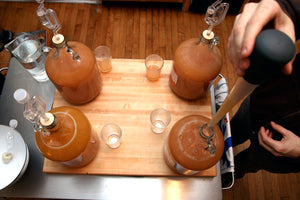
This is the basic process that you’ll use for every cider in Everything Hard Cider and almost every other fermentation you can think to perform. This recipe will net you 4 large bottles of inexpensive cider. You can enjoy this cider after 4–8 weeks.
Yields 4 (1 liter) bottles of Good Cider
1 pint water
Pinch of yeast nutrient
1 packet dried ale yeast, preferably English
1 gallon apple juice, room temperature – no preservatives (sorbates, benzoates)
1 ounce (by weight) corn sugar (optional—use only if you want sparkling cider)
- Clean your fermenting vessel with a nonsoap detergent like perfume- and dye-free OxiClean. Rinse well and air-dry. You must rinse the vessel clean. Any trace residue will end up in your cider and cause off flavors!
- Sanitize your fermentation vessel and 2 foil sheets. If using bleach, mix 1 tablespoon of bleach per 1 gallon of water. Soak for 20 minutes. Rinse thoroughly with boiled, cooled water and air-dry upside down. (For other sanitizers, follow their directions.)
Boil 1 pint of water, and let cool to 105°F. Mix in a pinch of yeast nutrient, and sprinkle the yeast over the water. Cover with sanitized aluminum foil, and let sit for 15 minutes. ❯
- Warm the apple juice to 60°F.
- Add the juice to the fermenter, and mix in the foamy yeast. Cover with more sanitized foil, and place somewhere dark and cool, preferably around 60°F. An interior closet works for most people.
- After 2–4 weeks, the yeast should be done fermenting and will have dropped clear with all the yeast and protein settling toward the bottom of the fermenter. If not already somewhere high, gently move the fer- menter and allow to re-settle. Sanitize your plastic bottles, caps, and tubing.
- To bottle still cider (without carbonation): siphon the cider from the fermenter, being careful to avoid the muck at the bottom, into each of your plastic bottles. Fill completely. Stop the flow of cider by pinching the tube before moving the hose to the next bottle. Screw on the caps and chill the cider in your fridge and drink when cool. Serve around 50°F.
- If bottling sparkling carbonated cider: dissolve the corn sugar in 1/2 cup of water, and bring to a light boil for 5 minutes. (If the water evapo- rates, add more water. You want the syrup to be almost as thin as water to blend more easily). Place the resulting syrup in the bottom of a sanitized bucket or jug. (You need to create this sugar syrup, because adding the sugar dry will cause the cider to foam uncontrollably.)
- Siphon the cider from the fermenter, being careful to avoid the muck at the bottom, into the container with the syrup. The flow of the cider should mix the sugar syrup evenly, but if you want to be sure, grab a whisk, sanitize it and gently swirl the cider for a minute. Siphon the now sweetened cider into the bottles, leave approximately two fingers width of airspace in the bottle, screw on the tops, and wait 2 weeks before chilling. You’ll know you’re ready when the plastic bottles become stiff and unyielding to the touch.
- When cold, usually around an hour, just pop the top and carefully decant (pour without disturbing the sediment) your cider into your favorite glass to enjoy! The still cider won’t have the full spritely carbon- ation of a sparkling cider. It may be what the French term “pétillant,” or just having a light prickly carbonation level that teases your tongue.
Choosing Juice
Your primary concern as a cider maker is finding the best juice possible. No matter how skilled you become, the initial quality of your juice drives the ultimate character of your cider. Getting great apple juice involves more than popping off to the supermarket. Fortunately, in this day of artisanal tastes and interest in eating locally produced food, you have many more options than before.
What do you need to look for? Your ideal juice will be sweet but not cloying. It should taste bright and zippy but not sour, and finally earthy and just a touch astringent. The typical American sweet juice probably won’t hit all of these notes, but there are ways to adjust your raw juice. (see below)
The best juices are the least processed—cloudy, cold, and raw. It sounds odd since modern society is obsessed with clarity, but the more cloudy the juice, the more interesting the cider. Why? Unfiltered juice has at least one fewer step involved in it, and all those proteins and other unfiltered elements can have a flavorful impact on your cider.
Read your labels closely! If the juice you’re looking at has potassium sorbate or sodium benzoate in it, skip it. Both will prevent a successful ferment and make you a sad cider maker. Remember, the fewer ingredients in your cider, the better!
So where should you go to find your juice? Here are a few options:
Orchards. Honest-to-goodness apple orchards are by far and away your best choices for finding juice. get the juice straight from the press and get your cider life started right. Sadly, this option is only really available during the fall and early winter. So if it’s not the right time of year, find another option.
Farm stands or farmers’ markets. If you can’t make it to an orchard, check your area for farm stands or farmers’ markets. Every fall, you should see jugs and jugs of fresh, sweet juice available for your cider making. Don’t forget to ask if they have a bulk discount!
Holistic, cooperative, and organic markets. Your local organic food market should stock sulfite- and preservative-free unfiltered apple juice. Look around the juice section and you may even find some interesting varietals and flavors to use.
Trader Joe’s. This one sounds odd, but if you have a Trader Joe’s near you, check for their Current Crop gravenstein Apple Juice. It’s flash pasteurized, relatively inexpensive, and makes an easy and amazing cider. If they don’t have the Gravenstein, they’ll have another unfiltered juice in plastic jugs.
Local grocery store. Many better stores now stock organic, minimally processed fruit juices in the produce section. Martinelli’s juices contain a blend of apples, including the Gravenstein variety available at Trader Joe’s.
Pasteurization makes juice stable, but the quick, high-heat exposure destroys delicate flavors and compounds . Remember: fresh is always best!
Other Additions that Make Your Cider Better - The Post Fermentation Additions
Give your cider a taste - odds are good it's thin and watery and bland. Two things really help pop that apple flavor up and deepen the cider. Stir these into small samples of your cider to determine the proper amount and then add those to the cider prior to packaging in bulk.
Grape Tannin - Available in powdered and liquid form - a little goes a long way towards improving the mouthfeel of your cider by adding body, depth and bitterness. "Proper" cider gets the tannins from the apples - particularly crab apples and other bitter apples, but we rarely have that luxury. When we say small, we're not kidding 1/8-1/4 tsp per batch is usually more than enough
Powdered Acid - Several forms exist, all with different impacts. Common varieities include Citric Acid (citrus fruits - very zippy), Malic Acid (apple acid - sharp and bright - think Granny Smith apples), Acid Blend (a blend of Citric, Malic and Tartaric [grape] acids). Acid adds zip, brightness and most importantly, freshness. Our palates are attuned to believe that acidic foods are fresh and therefore better. This is going to totally be to taste, so again, small doses into small samples and then scale up!